Transitioning to Winter Rye in Phoenix, Simplified
 |
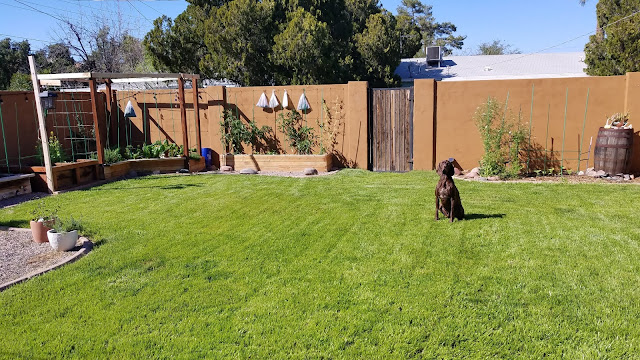
| Cooper tested, Cooper approved! |
As with my actual annual transition to a winter lawn, this post is probably coming a little too late to be useful this year. But since the weather this year has been unusually hot (today we expect record high temps of 89 degrees on November 16...), perhaps there's still a chance for you stragglers to benefit from my experiences.
If you have a lawn of Bermuda grass, or another summer grass, and you don't want to have a winter of dead brown grass, then overseeding with rye is for you.
Tools & Materials
Garden rake
Seed spreader (drop spreader preferred, broadcast acceptable)
Shovel
Wagon/wheelbarrow
Lawn Mower - I prefer electric for a small yard due to not needing any maintenance
Annual rye seed
Fertilizer
Topper - I prefer Kellogg organic Topper, you can find it at Home Depot.
 |
| A little work and you'll have a nice winter yard! |
Overseeding entails a few phases of preparation and work.
First is reducing the water for your Bermuda grass to help push it into dormancy. Don't just abruptly stop watering, taper it off to where you're watering maybe just once per week. Start the water taper at least two weeks before you plant your rye, which might mean the last week of September is when you start getting your yard ready.
Next is slowly cutting back the Bermuda grass to at least 1.5"; my lawnmower deck only goes down to 1.5" and that length has been just fine. I do this in the last week of the water taper--starting with whatever length I usually cut at, then lowering the deck .5" every couple days until it's down to 1.5". Conventional wisdom would have you "scalp" the lawn, cutting the Bermuda as close as absolutely possible, but according to the U of A cooperative extension scientist, that risks killing the Bermuda. Remember, you're only trying to encourage the Bermuda grass into dormancy so it doesn't outcompete the rye you're about to put down.
Now that the prep steps are done and nighttime temps are consistently under 65, you're ready to start planting.
Skip dethatching, proceed directly to seeding.
Conventional wisdom, again, tells you that the next step is "dethatching" the yard so sunlight can reach the new grass seed--meaning that you scour the yard collecting all the dead grass clippings that have accumulated over the year. Again, UA says this step can be skipped, and actually recommends skipping it because the raking can damage the Bermuda and slow it's growth next year. Common sense also tells you it's skippable since the thatch is basically just mulch and the last step is to cover the seed with topper, which...you know...blocs the sunlight. So you can safely skip the dethatching, and your back will thank you for it.
Planting the seed and spreading fertilizer are the easiest steps. Simply set your spreader to the appropriate setting (if it doesn't say on the spreader, Google your model) and cover the yard with each product. First make a pass around the perimeter, then cover the interior with slightly overlapping passes.
Once the seed is down spread topper over the entire planted area at about .25" deep. Last year when I contacted the UA scientist he suggested topper was unnecessary so I omitted it, only to find that my grass seed dried too quickly to germinate so I ended up having to reseed and then apply topper to get the rye to grow. Topper will absorb water, keeping your grass seed moist between waterings to help it germinate. It will also help provide additional nutrients as the grass grows. If you have a way to plant and grow winter rye that doesn't require topper let me know, because this step is heavy work.
When spreading topper I usually dump a bag into my wagon and use a shovel to distribute it around the yard, then I lightly rake the topper to evenly spread it. After trying several methods, like dumping the bag directly onto the yard and then raking, the shovel spread was the best way I found to evenly distribute topper.
From here all you have to do is water regularly and wait for your new yard! Over the course of two weeks, I usually water 4-5 times for 4-5 minutes until seedlings sprouted (adjusting if I see puddling or mushrooms), then cut it back to 3-4 times for 4-5 minutes for several days, then 2-3 times for 4-5 minutes, then I revert to my normal watering schedule of about once per week. If your sprinkler has a grow-in-period setting, it makes this process a lot easier.
I wait to mow the first time until the grass has grown to at least 4-5 inches; usually about three weeks or so after planting. I let it get longer than usual to help ensure the roots are strong enough that the grass gets cut instead of ripped out of the ground by my mower. After this, if you're watering properly once a week should be a fine mowing frequency.
 |
| Mow more frequently than this... |

Comments
Post a Comment